연락처
텍트로닉스 담당자와 실시간 상담 6:00am-4:30pm PST에 이용 가능
전화 문의
9:00am-6:00PM KST에 이용 가능
다운로드
매뉴얼, 데이터 시트, 소프트웨어 등을 다운로드할 수 있습니다.
피드백
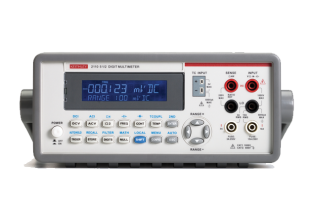
벤치탑 디지털 멀티미터(DMM)
애플리케이션에 가장 적합한 벤치탑 디지털 멀티미터(DMM)를 선택하세요.
Keithley는 모든 측정 요구 사항을 충족하는 가장 광범위한 시스템 및 벤치탑 디지털 멀티미터를 제공합니다. 이 디지털 멀티미터 (DMM) 제품군은 구성 요소, 모듈 및 조립 제품 제조 테스트를 위한 기본 DMM과 빠르고 정확한 DMM으로 학생 실험실의 요구 사항을 해결합니다.
어떤 디지털 멀티미터가 나에게 적합할까요?
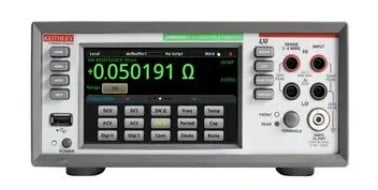
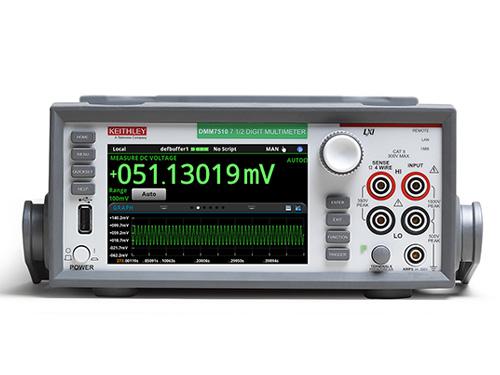
정밀 시리즈
Precision 시리즈는 하이엔드 디지털 멀티미터로, 데이터 수집부터 분석까지 간소화하는 터치스크린 인터페이스가 특징입니다. 이 시리즈는 높은 정확도와 속도를 결합한 제품으로, 시중에서 가장 정확한 7.5자리 DMM 중 하나로 손꼽히는 DMM7510 모델이 대표적입니다. 정밀하고 빠른 측정이 필요한 작업에 적합하며 고급 과학 및 엔지니어링 애플리케이션에 가장 적합한 제품입니다.
Instrumentation Series
The Instrumentation Series of digital multimeters focuses on providing the fundamentals of test and measurement with trustworthy results. These multimeters are reliable and easy to use, making them perfect for standard day-to-day measurement tasks. They offer a solid balance between performance and affordability, suitable for educational purposes, general electronic troubleshooting, and basic industrial applications.

10개 채널보다 더 다중 채널 측정이 필요한 경우 스위칭 및 데이터 획득 시스템을 참조하십시오.
또한 통합 디지털 멀티미터, 파워 서플라이, 전류 소스 및 전자 부하기 기능을 갖춘 Keithley SMU(Source Measure Unit) 측정을 고려해 보십시오.
키슬리 디지털 멀티미터(DMM)의 장점
키슬리의 벤치탑 디지털 멀티미터가 제공하는 다음과 같은 성능상의 이점을 누려보세요:
- 5½자리 해상도 ~ 7½자리 해상도 DMM
- 교정 실험실을 위한 7½ Digits DMM에서 9ppm 기본 전압 측정 정밀도
- IoT 장치 또는 기타 무선 장치에서 복잡한 저레벨 전류 프로파일을 캡처하기 위한 초당 1M 샘플의 빠른 속도
- 연구, 설계 및 제조 테스트를 위한 저전력 장치를 테스트하기 위한 1µΩ 및 1pA 민감도
- DC 및 AC 전압, DC 및 AC 전류, 2선 또는 4선 옴, 연속성, 주파수, 기간, RTD, 서미스터 및 열전대 온도, 다이오드 테스트 및 커패시턴스와 같은 광범위한 측정 기능
- 데이터 획득 및 자동 테스트를 위한 LAN/LXI, USB-TMC, GPIB 및 RS-232를 비롯한 다양한 인터페이스 옵션
- 최소한의 PC 상호 작용으로 테스트를 실행하고 사용자 정의된 측정을 생성하기 위한 인텔리전스
- 최대 10개 채널로 측정 확장
디지털 멀티미터를 공개합니다: 종합 가이드
DMM이라는 애칭으로 불리는 디지털 멀티미터는 전자 분야에서 일하는 모든 사람에게 없어서는 안 될 도구입니다. 전압, 전류, 저항 등 다양한 전기 파라미터를 정량화할 수 있는 다용도 측정기 역할을 합니다. 노련한 전문가든 초보 애호가든, 전자제품의 세계를 정확하고 자신감 있게 탐색하려면 DMM의 복잡성을 이해하는 것이 중요합니다.
디지털 멀티미터란 무엇인가요?
탁상용 디지털 멀티미터는 전압, 전류, 저항을 포함한 전기 자극을 측정합니다. 전기 및 전자 엔지니어가 매일 사용하는 진단 도구로 전압계, 전류계, 저항계의 기능을 결합한 제품입니다.
디지털 멀티미터는 어떤 용도로 사용되나요?
다음은 DMM의 몇 가지 일반적인 활용 사례입니다:
-
문제 해결: DMM은 회로, 구성 요소 및 장치의 전기적 결함을 식별하고 해결하는 데 중요한 역할을 합니다.
-
구성 요소 테스트: DMM은 개별 구성 요소의 전기적 특성을 측정하여 필요한 사양을 충족하는지 확인할 수 있습니다.
-
회로 테스트: DMM은 전자 회로의 올바른 작동을 검증하여 예상되는 전압과 전류를 제공하는지 확인하는 데 사용됩니다.
-
배터리 테스트: DMM은 배터리의 전압 및 전류 출력을 측정하여 배터리의 상태와 성능을 평가할 수 있습니다.
올바른 디지털 멀티미터를 선택하는 방법
시중에 수많은 DMM이 출시되어 있어 필요에 가장 적합한 DMM을 선택하는 것이 어려울 수 있습니다. 정보에 입각한 결정을 내리려면 다음 요소를 고려하세요:
-
측정 정확도: 특히 정밀한 측정이 중요한 애플리케이션의 경우 DMM의 정확도가 가장 중요합니다. 불확실성 비율이 낮은 값으로 표시되는 정확도 사양이 높은 DMM을 찾아보세요.
-
측정 범위: 측정 범위: 측정 범위는 DMM이 측정할 수 있는 값의 범위를 결정합니다. DMM의 범위가 애플리케이션에서 일반적으로 발생하는 값을 포함하는지 확인합니다.
-
특징 및 기능: DMM은 데이터 로깅, 트루 RMS 측정, 상대 모드 등 다양한 기능을 제공합니다. 특정 요구 사항에 맞는 기능을 갖춘 DMM을 선택하세요.
-
안전 등급: 전기 장비로 작업할 때는 안전이 가장 중요합니다. 선택한 DMM이 해당 애플리케이션의 안전 표준을 충족하는지 확인하세요.
DMM 선택 기준 및 사양에 대한 자세한 내용은 디지털 멀티미터 선택 가이드를 참조하세요.
리소스
Digital multimeter FAQs
How do digital multimeters work?
Digital multimeters attach to probes, leads, or clamps, which are connected to an electronic device. They then measure the device's voltage, current, or resistance and use an analog to digital converter to present a value on the display.
How do you use a benchtop multimeter?
Here's a step-by-step guide on how to use a digital multimeter:
1. Familiarize Yourself with the Multimeter: Before starting, take some time to familiarize yourself with the different parts of the multimeter, including the display, function selector knob, range selector knob, test leads, COM (common) terminal, and measuring terminal.
2. Choose the Measurement Type: Decide on the type of measurement you want to perform, such as voltage, current, or resistance. This will guide you in setting the function selector knob to the appropriate position (V, A, or Ω).
3. Select the Measurement Range: Estimate the approximate value of the parameter you're measuring. Set the range selector knob to a range that encompasses this value. Start with a higher range and gradually decrease it until you get a stable reading on the display.
4. Connect the Test Leads: Connect the black test lead to the COM terminal on the multimeter. Connect the red test lead to the appropriate measuring terminal based on the measurement type:
- Voltage: Red lead to the positive terminal of the circuit or component.
- Current: Red lead in series with the circuit element where you want to measure the current.
- Resistance: Red lead to one terminal of the resistor, black lead to the other terminal.
5. Turn on the Multimeter: Press the power button to turn on the multimeter.
6. Touch the Probe Tips: Carefully touch the probe tips of the test leads to the appropriate points on the circuit or component being measured. Ensure proper contact and avoid touching any other conductors or yourself.
7. Observe the Reading: Observe the displayed reading on the multimeter. The value will indicate the measurement of the parameter you selected.
8. Interpret the Reading: Pay attention to the units displayed along with the reading (V, A, or Ω). For voltage measurements, consider the polarity: positive for red lead on positive terminal, negative for red lead on negative terminal.
9. Disconnect the Test Leads: Once the measurement is complete, remove the test leads from the circuit or component.
How to read a digital multimeter?
Reading a digital multimeter involves understanding the different parts of the meter and how they work together to provide electrical measurements. Here's a step-by-step guide on how to read a digital multimeter:
1. Identify the Components:
A digital multimeter typically consists of the following components:
-
Display: The screen where the measurement readings are displayed.
-
Function Selector Knob: A dial or switch used to select the type of measurement you want to make, such as voltage, current, or resistance.
-
Range Selector Knob: A dial or switch used to select the range of values the meter can measure.
-
Test Leads: Two wires with probes at the ends, used to connect the meter to the circuit or component being measured.
-
Common Terminal (COM): The black test lead is typically connected to this terminal, which serves as the reference point for the measurements.
-
Measuring Terminal: The red test lead is typically connected to this terminal, which is used to make the actual measurement.
2. Connect the Test Leads:
-
Connect the black test lead to the COM terminal on the multimeter.
-
Connect the red test lead to the appropriate measuring terminal, depending on the type of measurement you want to make:
*For voltage measurements, connect the red lead to the positive terminal of the circuit or component.
*For current measurements, connect the red lead in series with the circuit element where you want to measure the current.
*For resistance measurements, connect the red lead to one terminal of the resistor and the black lead to the other terminal.
3. Set the Function Selector Knob:
Rotate the function selector knob to the desired measurement type, such as voltage (V), current (A), or resistance (Ω).
4. Set the Range Selector Knob:
Choose the appropriate measurement range based on the expected value of the parameter you are measuring. Start with a higher range and gradually decrease it until you get a stable reading on the display.
5. Take the Measurement:
-
Touch the probe tips of the test leads to the appropriate points on the circuit or component being measured.
-
Observe the reading on the display. The reading will indicate the value of the parameter you are measuring.
6. Interpret the Reading:
-
Pay attention to the units displayed along with the reading, such as volts (V) for voltage, amps (A) for current, and ohms (Ω) for resistance.
-
Consider the polarity for voltage measurements. A positive reading indicates that the red test lead is connected to the positive terminal, while a negative reading indicates that it is connected to the negative terminal.
7. Disconnect the Test Leads:
Once the measurement is complete, disconnect the test leads from the circuit or component.
What's the difference between handheld and benchtop digital multimeters?
Handheld digital multimeters, like those manufactured by Fluke, are used by electricians, electrical contractors and HVAC specialists to make measurements and troubleshoot potentially hazardous systems in the field. Benchtop multimeters, like those made by Keithley, are instruments used by electrical and electronic engineers to perform more advanced measurements and gain confidence in their designs. These instruments are extremely precise and have a variety of advanced functionality, including the ability to program automation, slow or speed up measurements to observe low-level or transient signal behavior, and interface with other instruments.
Can Keithley digital multimeters be rack mounted?
Yes, Keithley digital multimeters can be rack mounted with the appropriate kit.
What are the safety precautions when using a digital multimeter?
When using a digital multimeter, it is important to follow safety precautions to avoid electrical hazards:
-
Always read the user manual carefully before using the DMM.
-
Always use the appropriate voltage and current ranges for the circuit you are measuring.
-
Never touch exposed wires or components while the DMM is connected to a circuit.
-
Always work in a well-lit and ventilated area.
-
Wear proper personal protective equipment (PPE), such as safety glasses and gloves, when working with electrical circuits.
-
Never use a DMM that is damaged or malfunctioning.